
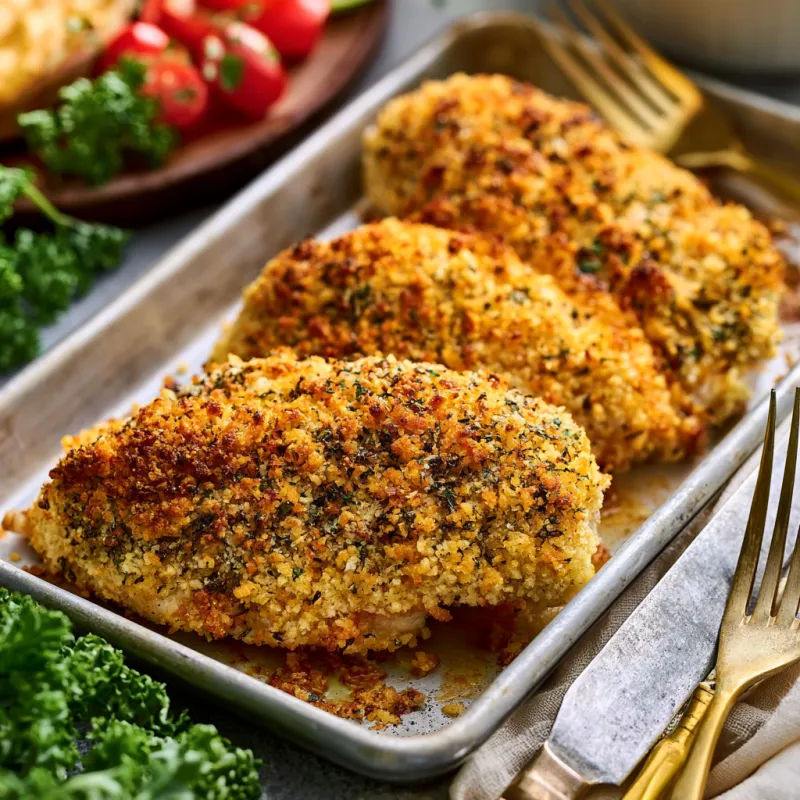
The first time I made parmesan crusted chicken, the coating slid off in one sad, greasy sheet. The chicken was dry, the crust was pale, and I ended up picking at it with a fork, wondering where I went wrong. I’ve since learned that the secret isn’t in the ingredients—it’s in the technique. A few small adjustments turn this dish into something reliably crisp, golden, and juicy. And you don’t need a deep fryer to get there.

This method uses a wire rack and a hot oven to create a crust that shatters when you bite into it. The parmesan adds a savory, nutty depth that plain breadcrumbs can’t touch. The chicken stays tender because it cooks quickly at high heat. Here’s exactly how to do it.
Why a Wire Rack Makes All the Difference
Place the breaded chicken directly on a wire rack set over a baking sheet. No parchment, no foil. The rack lifts the chicken off the pan, allowing hot air to circulate underneath. This prevents the bottom from steaming and turning soggy. The same principle applies to oven-fried foods: airflow is your friend. If you don’t have a wire rack, you can use an overturned oven-safe cooling rack, or even a broiler pan with the slotted top. But a standard wire rack works best.
The Right Parmesan Matters
Use finely grated parmesan—the kind you grate yourself from a wedge, or a good quality pre-grated variety that looks like fine sand. Avoid the powdery, shelf-stable stuff in a green can; it doesn’t melt properly and can turn gritty. The fine grate allows the cheese to blend evenly with the panko, creating a cohesive crust that browns beautifully. I keep the ratio at 1 part parmesan to 2 parts panko by volume. That gives enough cheese flavor without making the coating greasy.
Pound for Even Thickness
Chicken breasts are rarely uniform. A thick end will take longer to cook than a thin one, leaving you with dry edges and an undercooked center. Pounding to an even 1/2-inch thickness solves this. Place the breast between two sheets of plastic wrap and use a meat mallet or a rolling pin. Start from the center and work outward. You want the breast to be about the same thickness throughout. This step takes two minutes and pays off in perfectly cooked chicken.
The Breading Sequence: Flour, Egg, Panko-Parmesan
I don’t skip the flour. It might seem like an extra step, but it’s crucial. The flour absorbs any surface moisture, giving the egg something to grip. Without it, the egg slides off and the breading follows. After the flour, dip into the egg wash (egg plus a splash of water to thin it), then press into the panko-parmesan mixture. Use your fingers to gently press the coating into the chicken on all sides. This mechanical adhesion is what keeps the crust attached during baking.
Oil on Top, Not in the Pan
Instead of pouring oil into the pan or spraying the chicken with nonstick spray, drizzle the olive oil over the breaded chicken after it’s on the rack. Use about 1/2 tablespoon per breast, drizzling evenly. The oil helps the crust brown and crisp without making it greasy. If you spray the pan, the chicken sits in oil and the bottom steams. Drizzling on top gives you control and keeps the texture right.
Temperature and Timing
Bake at 425°F (220°C). This high heat is non-negotiable. Lower temperatures will dry out the chicken before the crust browns. At 425°F, the crust turns golden in about 20 minutes, and the chicken reaches 165°F internally. Use an instant-read thermometer to check the thickest part of the breast. If you don’t have one, cut into the thickest piece—the juices should run clear and the meat should be opaque throughout. But a thermometer is more reliable and removes the guesswork.
Let It Rest on the Rack
After baking, let the chicken rest on the rack for 5 minutes. This allows the crust to set and firm up. If you move it immediately to a plate, the trapped steam will soften the bottom. The rest period also lets the juices redistribute, so the chicken stays moist when you cut into it.
Common Mistakes to Avoid
I’ve made them all, so you don’t have to. Skipping the flour leads to a crust that slides off. Using wet chicken (not patted dry) creates steam that loosens the breading. Crowding the rack traps moisture and prevents browning. And pulling the chicken out before it reaches 165°F risks undercooking—but overcooking dries it out, so use that thermometer.
Make It Your Own
You can add a pinch of cayenne for heat, swap oregano for thyme, or use grated pecorino instead of parmeson for a sharper flavor. The base method stays the same. Serve with a simple green salad, roasted vegetables, or pasta with olive oil and garlic.
Takeaway: Parmesan crusted baked chicken doesn’t have to be a gamble. With a wire rack, proper breading sequence, and a hot oven, you get a crisp, golden crust every time. The technique is straightforward, the result is reliably satisfying, and it’s on the table in under 40 minutes.
Frequently Asked Questions
Why does my parmesan crust fall off the chicken?
The crust falls off if the chicken isn’t dry before breading, or if you skip the flour step. The flour creates a dry surface for the egg to cling to, and the egg bonds with the panko-parmesan. Also, pressing the breading firmly onto the chicken helps it adhere.
Can I use chicken thighs instead of breasts?
Yes, boneless, skinless thighs work well. Pound them to even thickness (about 1/2 inch) and bake at 425°F for 18-22 minutes, until internal temperature reaches 175°F for thighs. The dark meat stays juicy and forgiving.
How do I keep the crust from getting soggy?
The wire rack is essential. It lets hot air circulate under the chicken, so the bottom stays crisp. Also, don’t crowd the rack—leave space between pieces. And let the chicken rest on the rack after baking, not on a plate where steam would soften the crust.
Can I prepare this ahead of time?
You can bread the chicken up to 4 hours ahead. Place it on the wire rack, cover loosely with plastic wrap, and refrigerate. Add the olive oil drizzle just before baking. Do not bread more than 4 hours ahead, or the crust can become gummy.
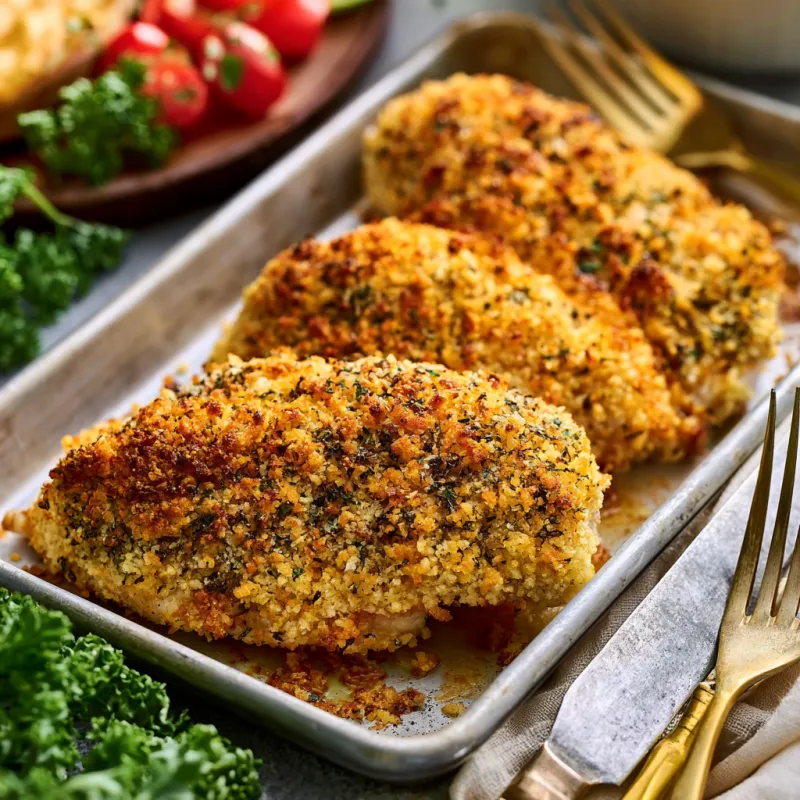
Parmesan Crusted Baked Chicken
Ingredients
Equipment
Method
- Preheat your oven to 425°F (220°C). Place a wire rack on a baking sheet and set aside.
- Place a chicken breast between two sheets of plastic wrap. Using a meat mallet or rolling pin, gently pound to an even thickness of about 1/2 inch. Repeat with all breasts. This ensures even cooking.
- Set up a breading station. In a shallow dish, add the flour. In a second shallow dish, whisk the eggs with the water until smooth. In a third shallow dish, combine the panko, parmesan, garlic powder, oregano, salt, and pepper. Mix well with a fork.
- Pat the chicken dry with paper towels. Dredge each breast first in the flour, shaking off excess. Then dip into the egg mixture, letting any excess drip off. Finally, press firmly into the panko-parmesan mixture, coating all sides. Place on the wire rack.
- Drizzle the tops of the breaded chicken with the olive oil. This is key for browning without frying.
- Bake for 20-25 minutes, until the crust is deep golden brown and the internal temperature reaches 165°F (74°C) when tested with an instant-read thermometer inserted into the thickest part.
- Let rest on the rack for 5 minutes. The crust will set and stay crisp. Garnish with parsley if desired, and serve.