
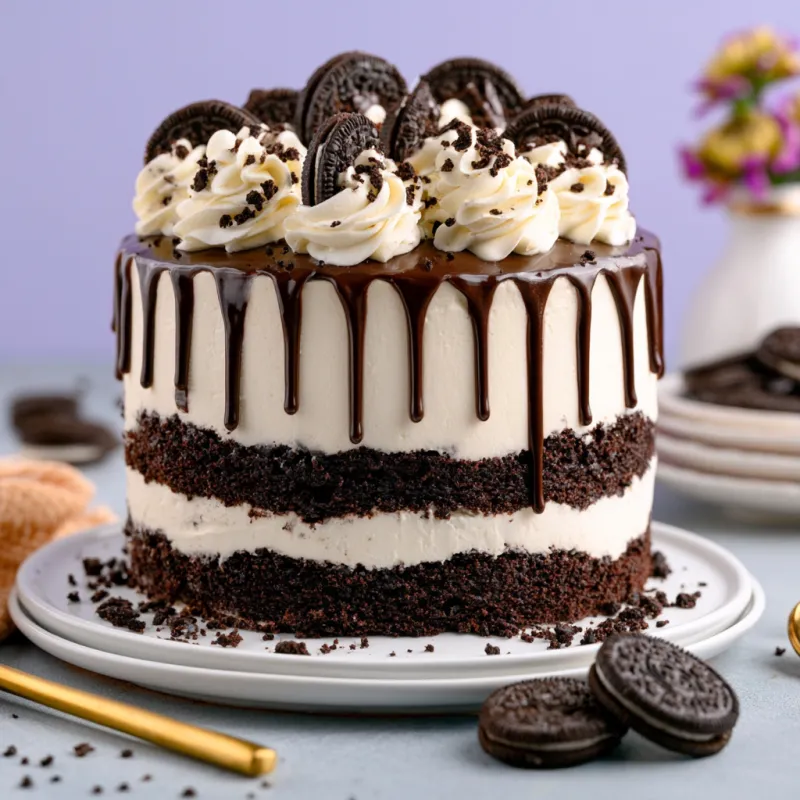
The first time I made a drip cake, the ganache ran straight off the sides and pooled on the board. It looked less like a bakery showpiece and more like a melting candle. The problem wasn’t ambition — it was temperature. A drip that holds its shape needs two things: a fully chilled cake and a ganache that’s cooled to exactly the right range. Too warm, and it races down. Too cool, and it sits on top in a thick blob. This Cookies & Cream Drip Cake uses a white chocolate ganache drip that stops exactly where you want it, paired with a crushed Oreo buttercream that stays stable at room temperature for hours. No sliding, no pooling, no surprises.

The Ratio That Makes the Drip Work
White chocolate behaves differently than dark or milk chocolate because of its higher cocoa butter content. For a drip that sets firmly but pours smoothly, I use a 3:1 ratio by weight — 6 parts white chocolate to 1 part heavy cream. That’s 6 ounces (170g) of finely chopped white chocolate to 1/2 cup (120ml) of heavy cream. This ratio creates a ganache that thickens as it cools but stays fluid enough to drip. If you swap chocolate types, adjust the ratio: milk chocolate needs 5:1, dark needs 4:1. I keep the ratio at 3:1 for white because any more cream and the drip becomes too runny to control.
The Temperature Window
After you stir the hot cream into the chopped chocolate, let the ganache sit at room temperature, stirring occasionally, until it reaches 85-90°F (30-32°C). This is the sweet spot. Below 85°F, it thickens too fast and won’t drip at all. Above 90°F, it runs like water. Test it on the side of a chilled glass first. If it flows slowly and stops after about an inch, it’s ready. If it runs straight to the bottom, let it cool another 2-3 minutes and test again.
The Buttercream: Stable but Not Stiff
An American buttercream is the right choice here because it holds its shape under the weight of the drip and the decorations. I use a 1:2 ratio of butter to powdered sugar by weight — 1 1/2 cups (340g) butter to 5 cups (600g) powdered sugar. This gives a frosting that’s firm enough to pipe sharp borders but soft enough to spread smoothly. The crushed Oreo crumbs go in at the very end, folded gently to avoid turning the frosting gray. Remove the cream filling from the cookies first — the filling adds extra fat that can soften the buttercream too much. Pulse the cookies in a food processor until they’re fine crumbs, then fold them in with a spatula.
Building the Cake for a Clean Finish
Level each cake layer with a serrated knife before stacking. Even 1/4 inch of unevenness will cause the drip to tilt to one side. After stacking and filling, apply a thin crumb coat and refrigerate for 30 minutes. This seals in crumbs and creates a smooth surface for the final buttercream layer. The final layer should be smooth and chilled for at least another 30 minutes. A warm cake will melt the ganache on contact, causing it to slide. I use a bench scraper to get the sides perfectly straight — any bumps or divots will show through the drip.
The Pouring Technique
Once the cake is fully chilled and the ganache is at 85-90°F, pour it directly onto the center of the top. Use a small offset spatula to gently push the ganache toward the edges. Let it drip naturally — don’t try to force it. If a drip doesn’t start where you want, you can nudge it with the tip of the spatula, but work quickly because the ganache sets fast on the cold cake. After the drips have formed, pipe a border of buttercream around the top edge to hold the pool of ganache in the center. This prevents it from spilling over the sides. Decorate with halved Oreos and extra crumbs immediately, before the ganache sets completely.
Common Mistake to Avoid
The most common error is rushing. If the cake isn’t fully chilled, or if the ganache is too warm, the drip will slide to the bottom and pool. Take the time to cool the ganache to the right temperature and chill the cake until it’s firm to the touch. Another mistake is using pre-crushed Oreo crumbs that include the filling. The filling makes the buttercream greasy and soft. Always remove the filling before crushing. For the cleanest look, sift the crumbs through a fine-mesh sieve to remove any large pieces that could clog a piping tip.
A Brief Takeaway
A drip cake that holds its shape comes down to three things: the right chocolate-to-cream ratio, a chilled cake, and patience with the ganache temperature. Once you master that, the rest is just assembly. This Cookies & Cream Drip Cake delivers on both looks and flavor — a vanilla base, creamy Oreo frosting, and a glossy white chocolate drip that stays put. Serve it at room temperature for the best texture, and watch it disappear.
Frequently Asked Questions
Why did my drip run all the way down the cake?
The ganache was too warm. Let it cool to 85-90°F (30-32°C) before pouring. Also, make sure your cake is fully chilled — at least 30 minutes in the fridge after the final buttercream layer.
Can I use milk chocolate instead of white chocolate for the drip?
Yes, but the ratio changes. For milk chocolate, use 6 oz chocolate to 1/2 cup cream. For dark chocolate, use 5 oz chocolate to 1/2 cup cream. White chocolate has more cocoa butter, so it needs a higher chocolate-to-cream ratio to set properly.
How do I get the Oreo crumbs into the buttercream without them turning the frosting gray?
Remove the cream filling from the cookies before crushing. Use a food processor to get fine crumbs, then fold them into the finished buttercream with a spatula. Overmixing can cause the crumbs to dissolve and discolor the frosting.
Can I make this cake ahead of time?
Yes. Bake the cake layers up to 2 days ahead and wrap tightly in plastic wrap at room temperature. Make the buttercream up to 5 days ahead and refrigerate in an airtight container. Bring to room temperature and re-whip before using. Assemble and decorate the day you plan to serve for the best drip appearance.
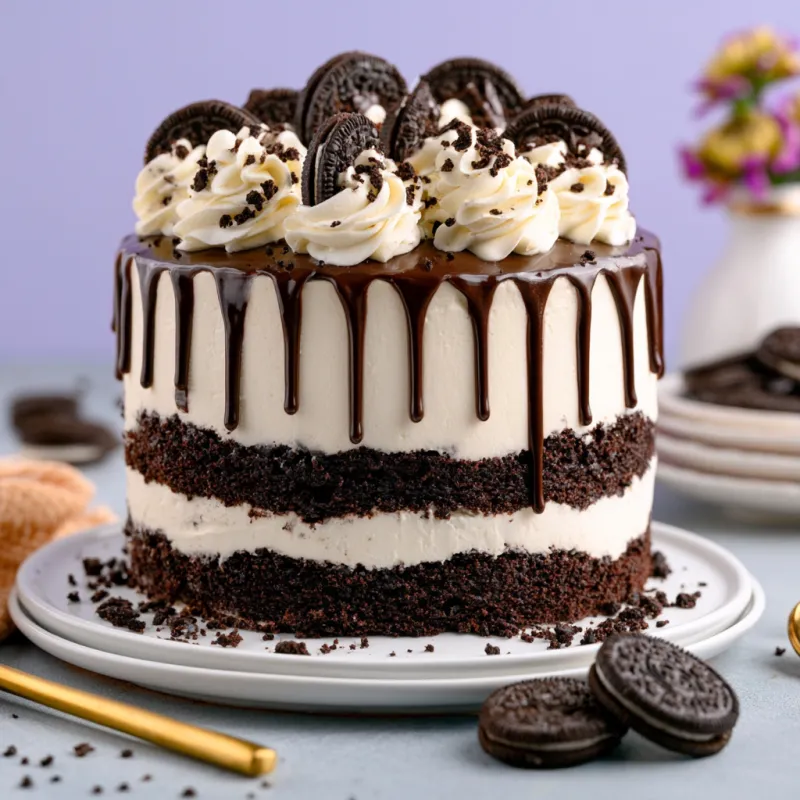
Cookies & Cream Drip Cake
Ingredients
Equipment
Method
- Preheat oven to 350°F (175°C). Grease three 8-inch round pans and line bottoms with parchment.
- Whisk flour, baking powder, and salt in a medium bowl.
- In a large bowl, beat butter and sugar on medium-high until light and fluffy, about 3 minutes.
- Add eggs one at a time, beating well after each. Stir in vanilla.
- Add flour mixture in three additions, alternating with milk, starting and ending with flour. Mix just until combined.
- Fold in crushed Oreo pieces (cream removed) gently with a spatula.
- Divide batter evenly among the three pans. Bake 25-30 minutes, until a toothpick inserted in the center comes out clean or with a few moist crumbs.
- Cool in pans 10 minutes, then turn onto a wire rack to cool completely.
- For buttercream: Beat softened butter on medium until smooth. Gradually add powdered sugar, then milk, vanilla, and salt. Beat on medium-high 3 minutes until fluffy. Fold in crushed Oreo crumbs.
- Level each cake layer with a serrated knife. Place one layer on a cake board or plate. Spread 3/4 cup buttercream evenly. Repeat with second layer. Top with third layer. Crumb coat the entire cake with a thin layer of buttercream. Refrigerate 30 minutes.
- Apply a final, thicker layer of buttercream. Smooth with a bench scraper. Refrigerate 30 minutes until firm.
- Make the drip: Place chopped white chocolate in a small bowl. Heat heavy cream in a small saucepan until it just simmers (small bubbles around the edge). Pour over chocolate. Let sit 1 minute, then stir until smooth. Let cool to 85-90°F (30-32°C) — the ganache should be thick enough to coat the back of a spoon but still pourable.
- Test the drip: Spoon a small amount over the edge of the cake. It should flow slowly, about 1-2 inches before stopping. If it runs too fast, let it cool further. If it's too thick, add a teaspoon of warm cream.
- Pour the ganache over the top of the chilled cake, pushing it gently to the edges with a small offset spatula. Let it drip naturally. Work quickly before the ganache sets.
- Immediately pipe a border of remaining buttercream around the top edge to contain the ganache pool. Decorate with halved Oreos and extra crumbs. Refrigerate 20 minutes to set the drip before serving.