
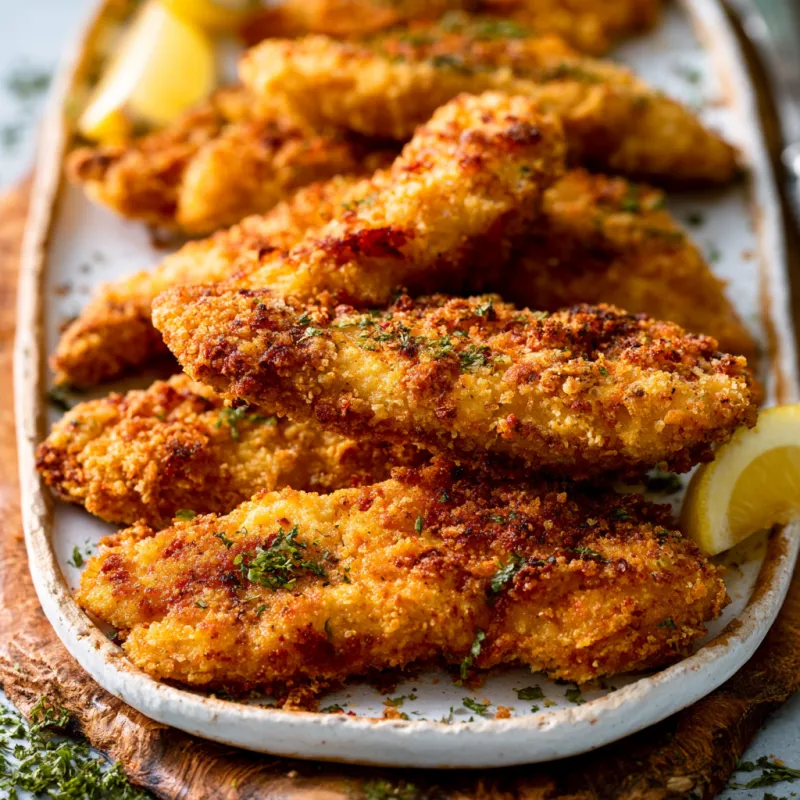
The first time I pulled a tray of chicken tenders from the air fryer, the coating slid off in one sad, pale sheet. It was edible, but not the kind of thing you’d make for company—or even for yourself on a Tuesday. The problem was moisture, or rather, the lack of a good strategy for it. Wet chicken plus hot air equals steam, and steam is the enemy of crunch.

After a dozen batches, I landed on a method that works every time: a light buttermilk soak for tenderness and adhesion, panko for structure, and a careful two-stage cook. The result is a tender that shatters when you bite into it, with meat that’s still juicy. No deep fryer required.
The Secret to Breading That Stays Put
The biggest complaint I hear about air fryer chicken tenders is that the breading falls off. It’s frustrating, but fixable. Here’s the thing: breading needs something to grab onto. A dry, bare piece of chicken is a poor surface for adhesion. A quick soak in buttermilk—just 30 minutes—does two things. First, the acid in the buttermilk gently tenderizes the chicken, breaking down some proteins so the meat stays soft. Second, the liquid creates a tacky surface that the panko clings to. When you press the crumbs into the coated chicken, they stick. When you then spray with oil and air fry, they fuse into a crust.
I keep the ratio at 1 cup buttermilk per pound of chicken. Any more and you’re just wasting marinade. Any less and you won’t have enough to coat every strip evenly. If you don’t have buttermilk, make a quick substitute: 1 cup of milk plus 1 tablespoon of lemon juice or white vinegar. Let it sit for five minutes. It will thicken slightly and develop the same tangy profile.
Panko vs. Regular Breadcrumbs
I use panko almost exclusively for air fryer tenders. Panko is a Japanese-style breadcrumb that’s flakier and larger than standard breadcrumbs. Those jagged edges create more surface area, which means more crispness per bite. They also absorb less oil, which is ideal for an air fryer where you’re using only a light spray.
I add a quarter cup of finely grated Parmesan to the panko. This is optional, but it adds a savory depth and helps the crumbs brown more evenly. If you skip the cheese, the tenders will still be good—just slightly less golden. The cheese also introduces a subtle umami note that balances the tangy buttermilk.
How to Coat Without Making a Mess
Set up a simple assembly line: one bowl with the marinated chicken, one shallow dish with the panko mixture, and a clean plate for the coated tenders. Use one hand for wet (pulling chicken from the buttermilk) and one hand for dry (pressing into panko). This keeps your fingers from getting clumpy and the breading from turning into paste. Let the excess buttermilk drip off before coating—too much liquid will make the panko soggy before it even hits the air fryer.
Temperature and Timing: The Critical Difference
Air fryers vary, but I’ve found 390°F (200°C) to be the sweet spot. Lower temperatures take too long and dry out the chicken. Higher temperatures risk burning the panko before the inside is cooked. At 390°F, the exterior crisps in about 5 minutes per side.
The mistake most people make is not preheating. A cold air fryer means the chicken starts cooking slowly, and the coating absorbs oil before it has a chance to set. I preheat for 3 minutes, which is enough to get the basket hot. Then I spray the basket lightly with oil, place the tenders in a single layer (they should not touch), and spray the tops. This initial spray is what starts the browning process.
After 5 minutes, I flip each tender with tongs. The bottom side will be pale and soft. That’s normal. I spray that side and cook for another 4 to 5 minutes. The exact time depends on thickness. Thin tenders might be done in 8 minutes total; thicker ones might need 11. The only reliable test is an instant-read thermometer. Insert it into the thickest part of a tender. It should read 165°F (74°C). Anything less, and the chicken isn’t safe. Anything more, and it’s starting to dry out.
Visual Cues: What to Look For
You don’t need a thermometer for every batch once you know what to look for. A perfectly cooked tender is deep golden brown with patches of slightly darker brown where the panko flakes have toasted. The surface should look dry and craggy, not oily. When you press a tender with a spatula, it should feel firm but give slightly. If it feels hard, it’s overcooked. If it feels squishy, it needs more time.
Juices should run clear when you cut into the thickest part. If they’re pink or cloudy, put the tender back in the air fryer for another minute. Let the tenders rest on a wire rack for two minutes after cooking. This step is often skipped, but it’s important. If you pile them on a plate, steam trapped underneath will soften the bottom crust. A wire rack lets air circulate around the entire tender, keeping it crisp all the way around.
Common Mistakes and How to Avoid Them
- Skipping the marinade: Without the buttermilk soak, the chicken will be drier and the breading will be more likely to fall off. Even 15 minutes helps.
- Overcrowding the basket: If tenders are touching, they steam instead of crisp. Work in batches if needed. It adds 5 minutes total but makes a huge difference.
- Using too much oil: A light spray is all you need. Drenching the tenders will make them greasy and heavy. The air fryer works by circulating hot air; oil is just for browning.
- Not flipping: The bottom of the tender sits against the basket and gets less direct heat. Flipping ensures even browning and crispness on both sides.
Takeaway
Air fryer crispy chicken tenders are one of those dishes that look impressive but are actually forgiving once you understand the mechanics. The buttermilk soak is non-negotiable for texture and flavor. Panko gives the crunch. The two-stage cook at 390°F ensures the inside stays juicy while the outside turns golden. Serve them with a simple honey mustard or a squeeze of lemon. They reheat well, too—just a few minutes back in the air fryer at 350°F, and they’re almost as good as fresh.
Frequently Asked Questions
Why did my breading fall off in the air fryer?
The most common reason is skipping the buttermilk soak. The buttermilk not only adds flavor and tenderness, but the lactic acid helps the breading adhere. Also, make sure you pat the chicken dry before the marinade, and let the excess drip off before coating. Press the panko on firmly. Finally, don’t overcrowd the basket; steam from crowded tenders can loosen the coating.
Can I use regular breadcrumbs instead of panko?
Yes, but panko gives a much lighter, crispier texture. Regular breadcrumbs will result in a denser, finer crust. If using regular breadcrumbs, consider toasting them lightly in a dry pan first for extra crunch. You may also need to reduce the cook time by a minute, as they brown faster.
How do I keep the chicken tenders from drying out?
The buttermilk marinade is your best defense. It tenderizes the meat and locks in moisture. Also, do not overcook. Cook to exactly 165°F (74°C) and no higher. Letting them rest for a couple of minutes on a wire rack also helps redistribute juices. Finally, avoid using frozen chicken tenders without thawing completely, as uneven cooking leads to dryness.
Can I make these dairy-free or gluten-free?
Yes. For dairy-free, use a thin dairy-free yogurt or a mixture of unsweetened almond milk and a teaspoon of lemon juice instead of buttermilk. Skip the Parmesan. For gluten-free, use certified gluten-free panko. Always check labels on spices and other ingredients to ensure they are gluten-free. For specific dietary needs, consult a qualified professional.
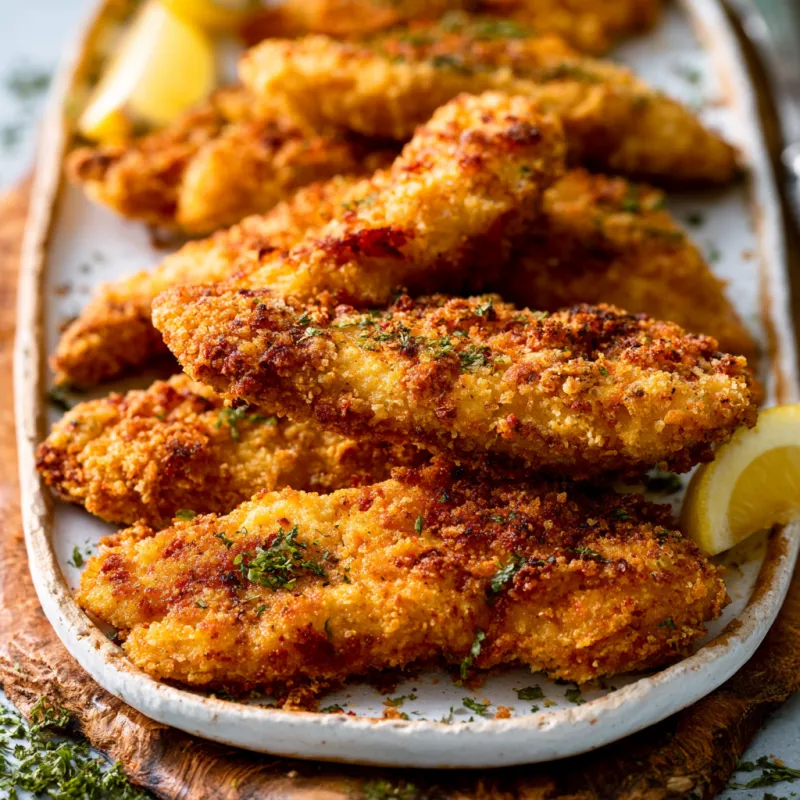
Air Fryer Crispy Chicken Tenders
Ingredients
Equipment
Method
- Pat the chicken tenders dry with paper towels. In a bowl, whisk together buttermilk, salt, pepper, garlic powder, and paprika. Add chicken, turning to coat. Cover and refrigerate for at least 30 minutes (or up to 4 hours). This step is key for moisture and flavor.
- In a shallow dish, combine panko and Parmesan (if using). Remove a few tenders from the buttermilk, letting excess drip off. Press each tender into the panko mixture, coating evenly. Place on a plate. Repeat with all tenders.
- Preheat your air fryer to 390°F (200°C) for 3 minutes. Lightly spray the air fryer basket with oil.
- Place tenders in a single layer in the basket, leaving a little space between each for air circulation. You may need to cook in two batches. Lightly spray the tops of the tenders with oil.
- Air fry for 5 minutes. Flip each tender with tongs, spray the other side lightly, and cook for another 4-5 minutes, until golden brown and the internal temperature reaches 165°F (74°C) on an instant-read thermometer.
- Let rest on a wire rack for 2 minutes before serving. This keeps the bottom from getting soggy.